

Many Minecraft chandeliers adhere to a medieval aesthetic, using fence blocks, cobblestone walls, and the like to build a pretty, historical-looking chandelier. This build takes a different approach, giving a simple chandelier design a modern twist through the use of glass blocks and end rods.
This guide will make it easy to build for both new and experienced players of Minecraft alike by showing how to build the chandelier in a step-by-step process. The chandelier was created in Vanilla Minecraft on Java Edition.
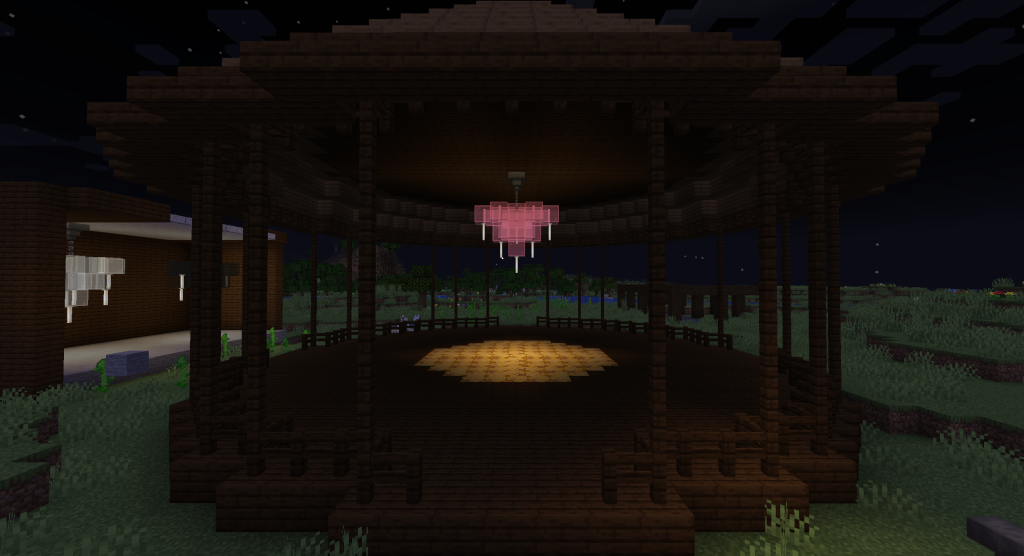
Table of Contents
Materials List

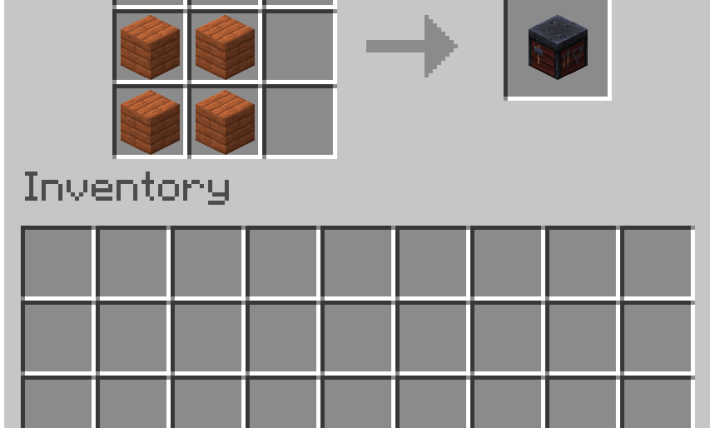
The required materials are one hopper, one chain, seventeen glass planes, nine glass blocks, and six end rods. The end rods can be substituted for lanterns to make the build a bit easier. The glass blocks and panes can be regular or stained; for this example, I stained them pink.
Chandelier Base
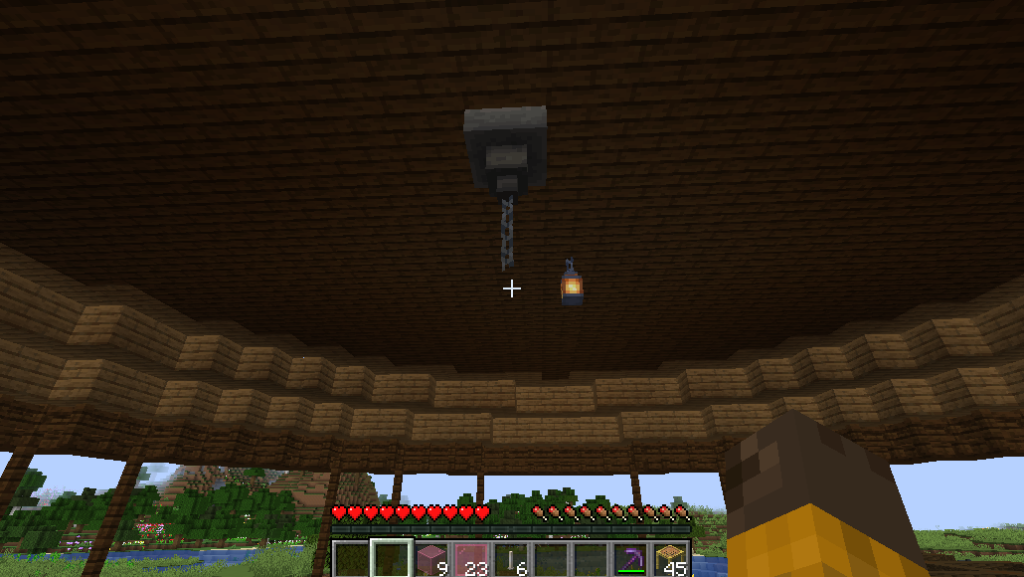
This easy Minecraft chandelier requires a base of one hopper and one iron chain. Construct it by placing one block on the ceiling where you want the hopper to go, then attaching the chain to that block. Break the block and replace it with the hopper!
Building the Chandelier
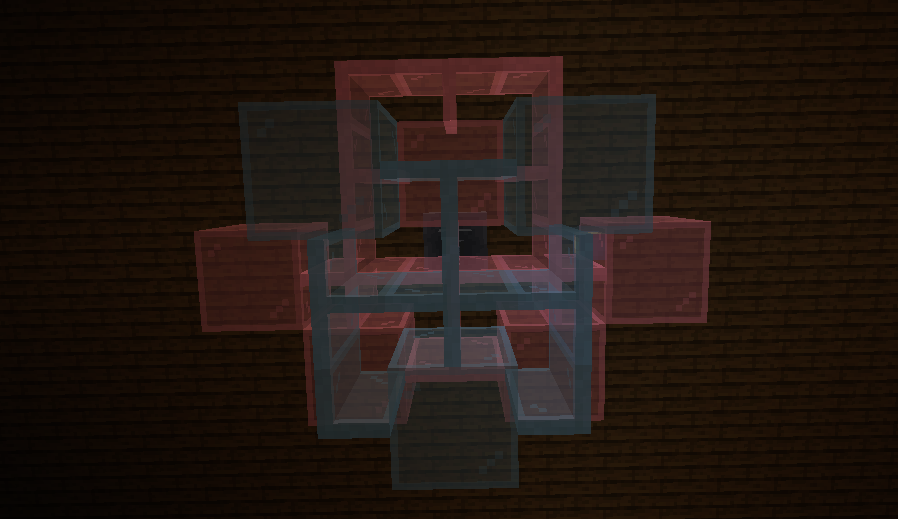
The chandelier is built in three layers, which are laid out for you below. The left layer is the top, with the middle design being placed in the middle and the right layer being the bottom. The white “C’s” drawn on represent which blocks go in the center, directly beneath the chain.
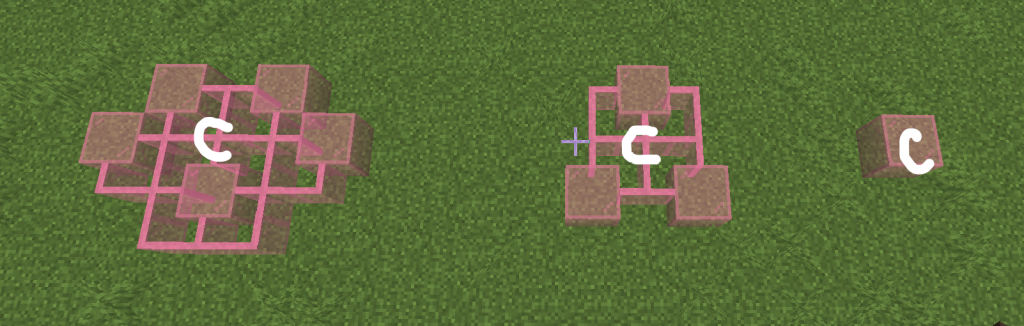
First Layer
For the first layer, place a glass pane directly below the chain. Place another pane directly in front of it. Add one glass block to the left and right of the newly placed pane.
Add one pane to the left of the center pane, placing a glass block to its left. Repeat the process in reverse on the right side.
To finish off the layer, place one glass block behind the center pane and surround it with glass panes.
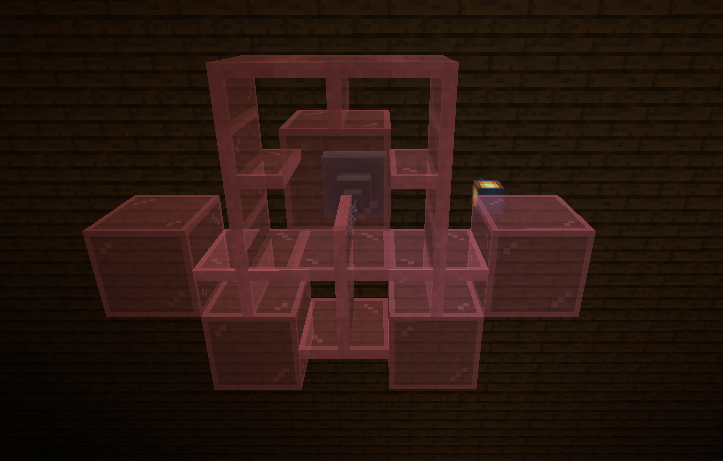
With that, the first layer is done!
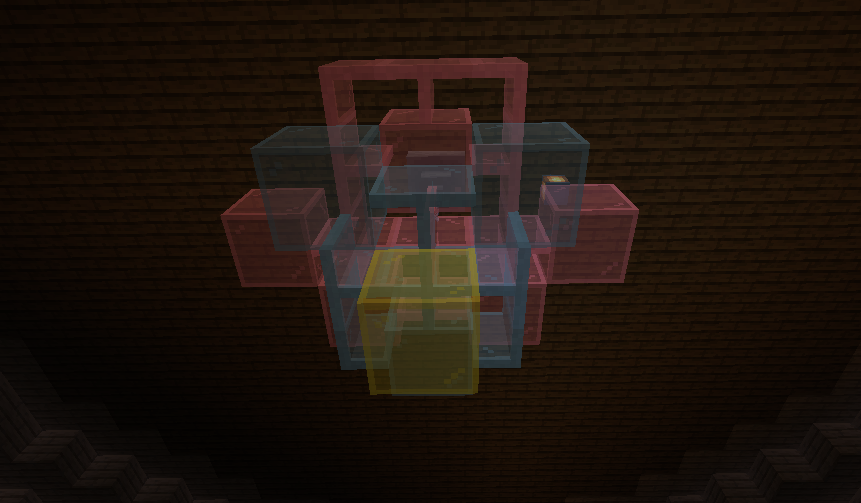
Second Layer
*The second layer will be done with light blue stained glass, to help differentiate it from the first layer.*
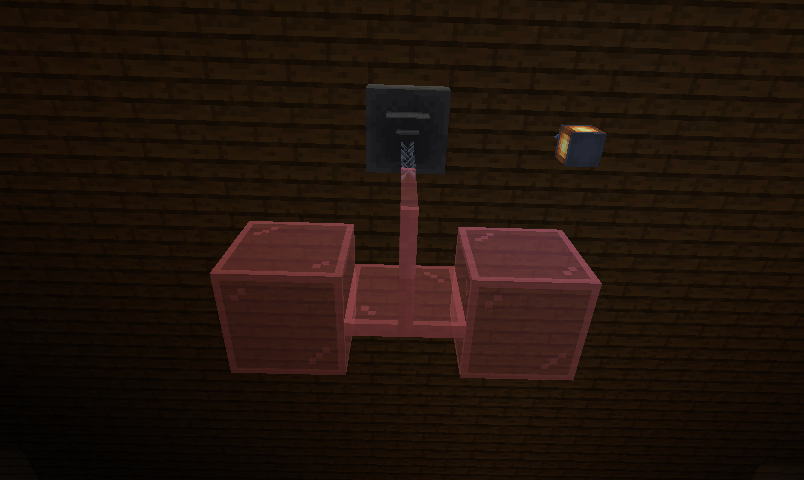
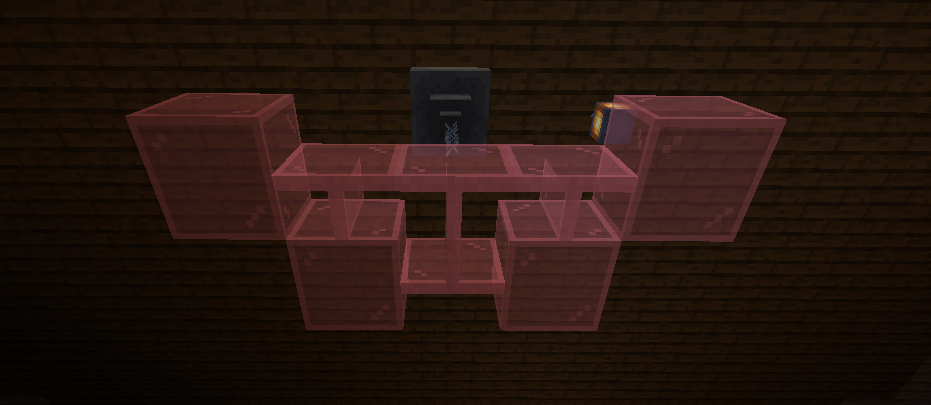
Start the second layer by placing a glass pane directly beneath the center pane from the first layer.
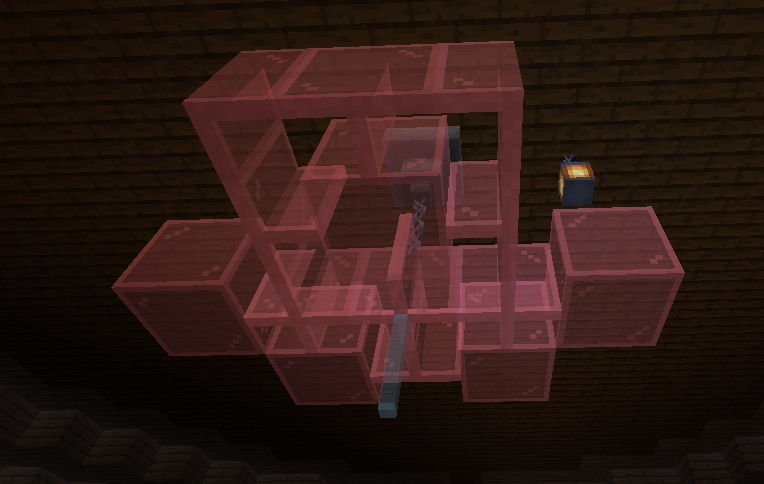
Next, place a glass block directly above it. Add one glass pane to the left of that block, and one to the right.
Place one glass pane to the left of the center pane, and one to its right.
Add one glass pane behind the center pane. Add one block to the left of the new pane and another to its right.
That’s the second layer completed!
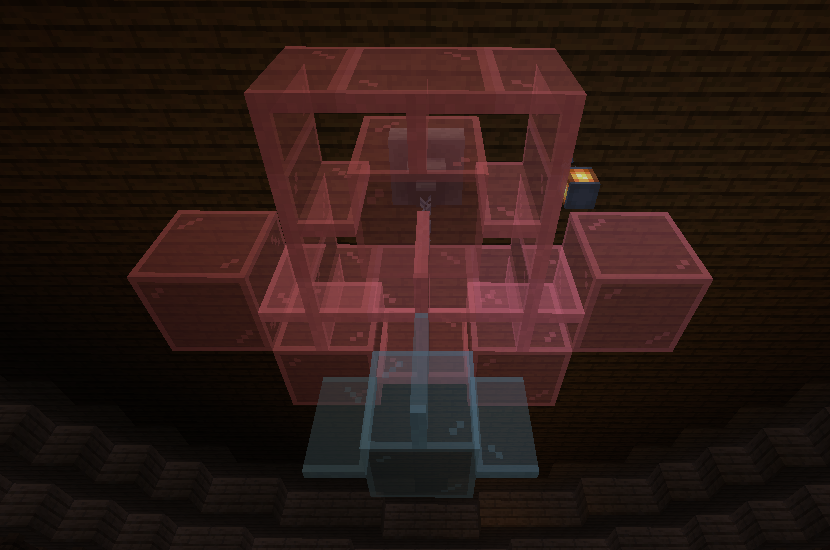
Third Layer
*This layer is done with yellow stained glass*
The third layer is the simplest. Just add one stained glass block beneath the center pane!
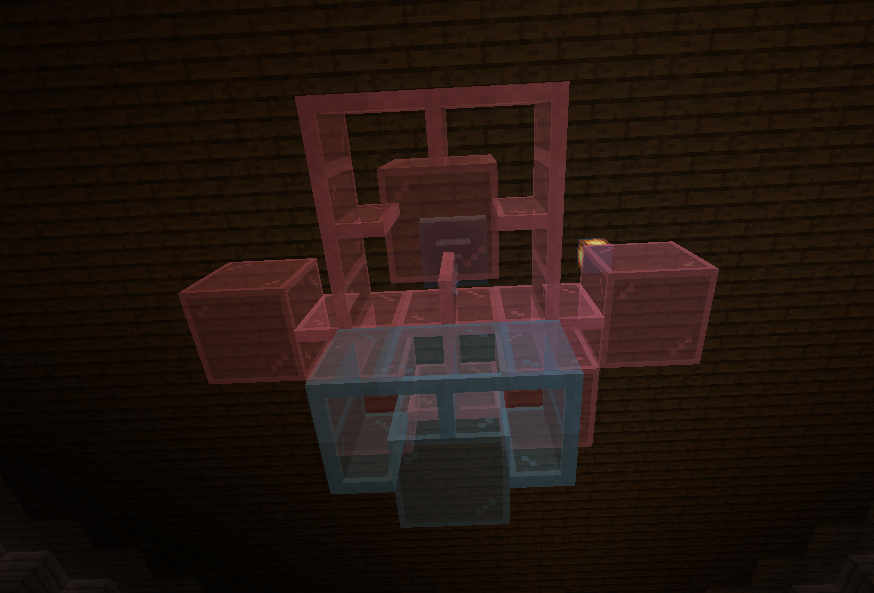
Adding Lights
Take creative freedom when adding lights! Here I used seven end rods (five horizontally along the chandelier, with one extra in front and one extra behind), as I really like how they give off white particles. It makes the chandelier look a little more sparkly.
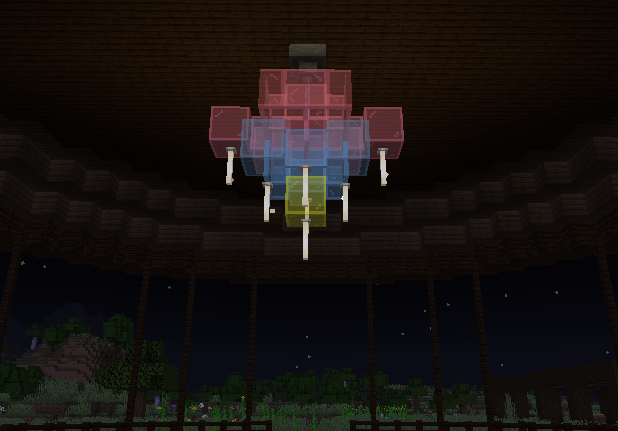
Creativity Notes
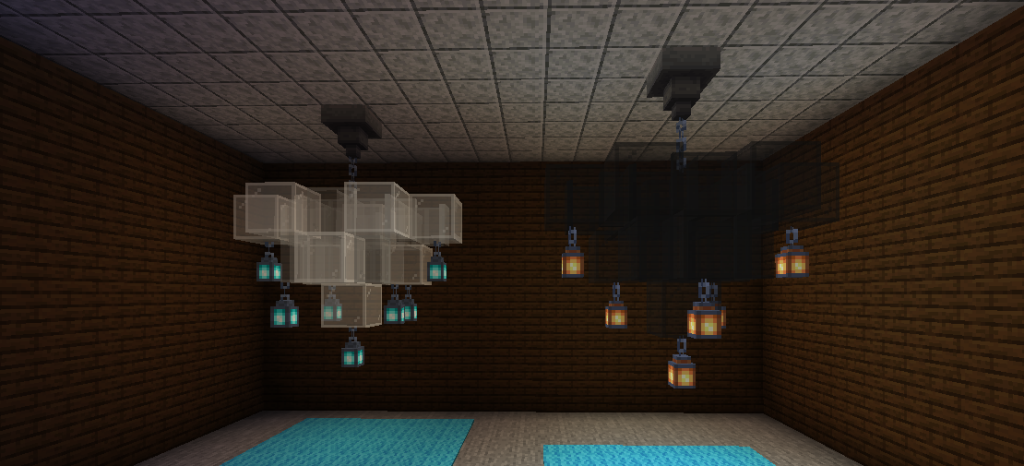
You can really use any hanging light sources and glass blocks you’d like! Don’t be afraid to mix and match different light sources and colors of glass, either.
Here I remade the chandelier with different glass and light sources. The first used white stained glass blocks and white stained glass panes with soul lanterns. The second uses black stained glass blocks and panes with regular lanterns.